

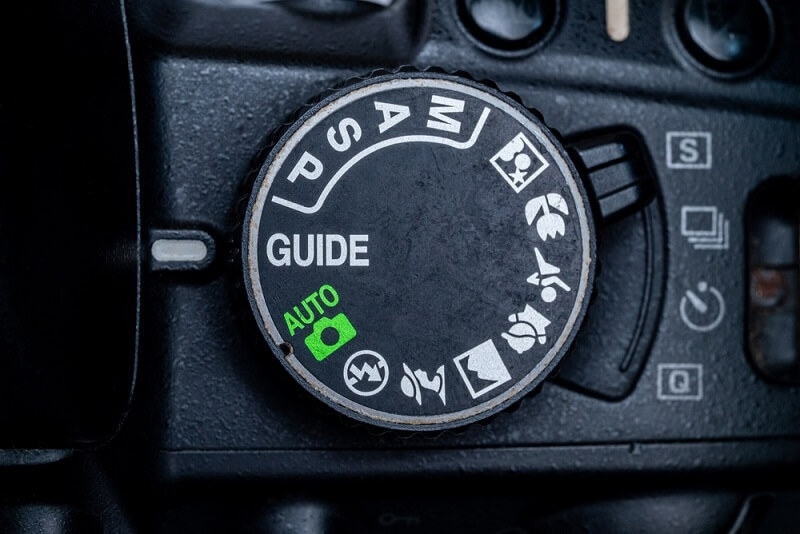
Every camera has that little dial on top. You’ve seen it. Maybe you’ve twisted it once or twice and hoped for the best. Those letters, P, S, A, and M, are not random. They are the backbone of digital camera modes. When you understand them, your photos shift from casual snapshots to intentional images with depth, motion, and mood.
This guide walks through camera modes explained in plain language. We’ll break down PSAM mode, talk about manual mode camera control, and show how aperture priority mode and shutter priority mode shape your final image. Whether you’re shooting fall colors in Vermont or Friday night lights in Texas, these tools help you get pro results without feeling overwhelmed.
Most beginners think digital camera modes are complicated. They’re not. They’re simply different ways of sharing control between you and your camera.
Think of it like driving a car. Sometimes you want full control. Sometimes cruise control is fine. Your camera works the same way.
PSAM mode stands for Program, Shutter Priority, Aperture Priority, and Manual. These four settings are available on most DSLR and mirrorless cameras from brands like Canon, Nikon, and Sony.
Each mode adjusts three key elements:
Every photo balances those three. Change one, and the others respond. That balance is called exposure. Sounds technical, but it’s really just about light.
Program mode is often labeled P. It’s like autopilot with a bit of wiggle room. The camera chooses aperture and shutter speed for you, but you can still adjust ISO and exposure compensation.
Program works well for:
If you’re walking around New York City and want sharp, well-exposed images without fussing over settings, Program mode is a solid choice. It’s not “beginner only.” Even seasoned photographers use it when speed matters.
Now we’re getting into creative territory. Aperture priority mode, labeled A or Av, lets you choose the aperture. The camera picks the shutter speed to match.
Aperture controls depth of field. That’s how much of your photo is sharp from front to back.
Wide aperture like f1.8
Narrow aperture like f11
If you’re photographing spring cherry blossoms in Washington, D.C., and want creamy background blur, aperture priority mode gives you that control instantly.
Also Read: Boost Efficiency with a Streamlined Editing Workflow
Shutter priority mode, labeled S or Tv, lets you control shutter speed. The camera adjusts the aperture for correct exposure.
Shutter speed affects motion in your image.
Fast shutter like 1 over 1000
Slow shutter like 1 over 10
If you’re shooting high school football under stadium lights, shutter priority mode is your friend. Set a fast speed, and let the camera handle the rest.
But here’s the thing. In low light, the camera might choose a wide aperture that limits the depth of field.
Manual mode camera setting is labeled M. This is where you control aperture, shutter speed, and ISO yourself.
It sounds intimidating. It’s not. It just requires attention.
Manual works best when the lighting is steady:
Imagine shooting a sunset in Arizona. The light changes slowly. In manual mode camera settings, you can adjust exposure as the sky deepens without the camera second-guessing you.
Manual also prevents exposure shifts in tricky lighting, like concerts or backlit scenes.
At first, you might feel clumsy. You’ll take a shot, check the histogram, adjust, and try again. That’s normal. Over time, it becomes second nature, like shifting gears without thinking.
With all these digital camera modes, how do you pick one? Here’s a simple way to think about it.
Ask yourself one question. What matters most in this shot?
That’s it. Keep it simple.
You know what trips people up? Overthinking. Photography is technical, yes, but it’s also intuitive. If your photo looks too dark, adjust. Too bright, adjust again. Digital cameras give instant feedback. Use it.
Let’s connect this to everyday life.
You’re shooting engagement photos in California. The sun is low, and the light is soft.
Use aperture priority mode at f2.8 for a gentle background blur. Watch your shutter speed; if it drops too low, bump the ISO slightly.
Bright afternoon. Fast movement.
Switch to shutter priority mode. Set 1 over 1000. Let the camera handle aperture. You’ll freeze those mid-kick moments perfectly.
Tripod set up in Chicago. Steady scene.
Manual mode camera settings shine here. Choose a slow shutter speed like 10 seconds. Set the aperture to around f8. Adjust the ISO low for clean detail.
See how each scenario naturally leans toward a specific mode? That’s the beauty of PSAM mode. It’s not random. It’s practical.
Mastering digital camera modes is less about memorizing letters and more about understanding light and intent. PSAM mode gives you flexibility. Aperture priority mode shapes depth. Shutter priority mode captures or blurs motion. Manual mode camera control gives you full command when conditions demand it.
You don’t have to use one mode forever. Shift as needed. Experiment. Make mistakes. That’s part of the process.
In the end, great photos come from awareness. Awareness of light. Of motion. Of mood. Once you see how camera modes explained through real situations connect to your creative choices, the dial on top of your camera stops feeling mysterious.
Aperture priority mode is often easiest. It gives creative control over blur while the camera manages shutter speed.
Not always. Manual gives full control, but aperture priority mode or shutter priority mode can be faster and just as effective.
Use it when motion matters. Sports, wildlife, or moving cars benefit from precise shutter speed control.
The concept is the same across Canon, Nikon, Sony, and others. The dial layout may differ slightly, but the functions remain consistent.
This content was created by AI